Start with the work, not the organizer.
Before buying a tray or clearing a shelf, notice what happens on your desk during an ordinary day. Perhaps you review incoming forms, write a few notes, answer calls and put papers aside for someone else. At home, the same table may hold a laptop in the morning and a school project in the afternoon. The useful question is not how many containers will fit. It is which things need to be easy to find, move or put away.
Make three small groups: what you use every day, what you need occasionally and what belongs somewhere else. Keep the first group within comfortable reach. Find a drawer, shelf or nearby cabinet for the second. Return the third to its proper place before it becomes a permanent part of the desk. This first sort often reveals that the problem is an unclear destination rather than a shortage of storage.
Choose one annoyance to solve first. If pens vanish beneath papers, give writing tools a visible compartment. If forms arrive in a pile, create a place for incoming work. If you move between rooms, choose a portable case that carries the current task. An arrangement that solves one real problem is easier to judge than a complete desk makeover with several new habits to maintain.
Try this today: clear one working area large enough for the task you do most often. Keep only the items that help with that task beside it. Let the rest earn its place over the next few days.
Measure the usable space.
The outside width of a desk drawer does not tell you whether a tray will fit inside. Measure the clear interior width and depth, then check the available height beneath the drawer opening or any internal rail. Look for rounded corners, screw heads and runners that take up space. Leave enough clearance to lift an organizer out without wedging it against the sides.
For a desktop organizer, use a sheet of paper or a piece of removable tape to mark the intended footprint. Sit at the desk with your usual equipment in place. Can you still use the keyboard, open a notebook and reach the controls on your monitor? Check the space above the organizer too: upright folders need room to slide out, and a shelf over the desk may limit the practical height.
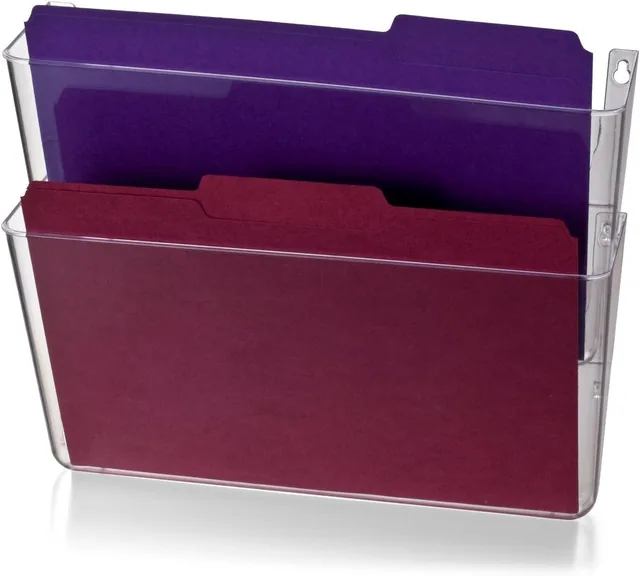
Read dimensions in their stated order. A wide, shallow tray and a narrow, deep tray can have similar numbers but very different effects on a workspace. Pack quantities matter as well. A two-pocket wall-file set creates a different arrangement from a single pocket; a photograph showing a completed setup does not necessarily mean every pictured piece comes in one package.
| Where it goes | Measure | Leave room for |
|---|---|---|
| Inside a drawer | Clear internal width, depth and height | Rails, corners and lifting the tray out |
| On a desktop | Available footprint beside your working area | Writing, cables and opening nearby drawers |
| On a wall | Mounting area and the surface type | Reaching in and removing papers vertically |
| On a shelf | Shelf depth and space between shelves | Book height and room to remove an item |
Give every active paper a next step.
A pile often mixes several different decisions: something to read, something to sign, something to file and something to pass along. Separating those decisions is more helpful than simply straightening the stack. Start with a few clear destinations that describe actions. “Incoming,” “Working” and “Ready to send” can be enough for a small desk. Use names that match your actual routine.
Keep loose pages flat in a tray when they belong to one stage of work. Use an upright sorter when you need to distinguish several folders or projects at a glance. A combination organizer can bring those two formats together, but check its full footprint before committing desk space. Keep only current work there; completed files can move to longer-term storage so they do not hide the pages that still need attention.
Choose a consistent way to label folders. A project name and the next action are often more useful than a broad label such as “Miscellaneous.” If several people use the system, agree on what each destination means. A tray labelled “Outgoing” should not also become a place for unfinished drafts. The container cannot make that distinction for you.
Keep pages belonging to one task together with a suitable clip while they remain active. Do not force a small clip around a thick bundle or use a giant clip for a few delicate scraps when a smaller option is easier to handle. Review the incoming area regularly and make a decision about each item. Moving paper between containers without deciding what happens next simply moves the pile.
Explore letter trays with an upright side sorter or compare the smaller tools in paper essentials.
Give the little things sensible groups.
A divided drawer tray is useful when small objects regularly spread across the work surface. Group items by use rather than by how they look in a photograph: writing tools together, clips together, page markers near the notebook supplies. Put the group you reach for most in a convenient compartment. Keep the layout simple enough that you can return something without stopping to think.
Depth matters. A deeper tray can hold more supplies, but a full compartment can still hide what is at the bottom. Keep a working quantity in the desk and store unopened refills elsewhere if you have suitable storage. The goal is to see and reach what you need, not to move an entire supply cupboard into one drawer. A compartment that is always overflowing is a sign to reduce its contents or change the grouping.
Check the length of pens, rulers and other tools against the actual compartments. The organizer’s outside dimensions do not guarantee that a particular object fits one internal space. Use the product photos to understand the layout, then check any relevant measurements before ordering. When exact compartment dimensions are unavailable, avoid choosing solely around a tight fit for one unusual tool.
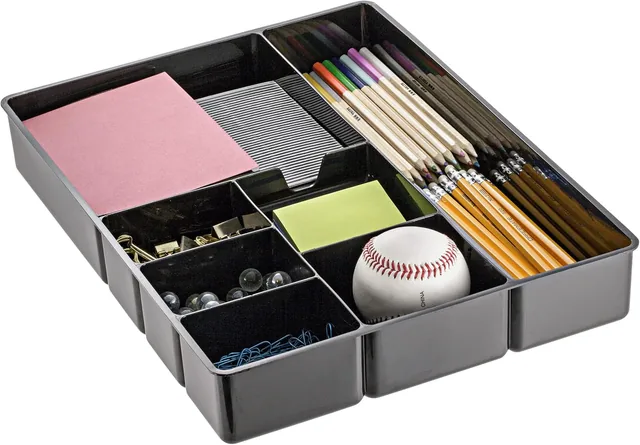
For items that deserve to stay visible, an open note organizer can be a better choice than a drawer. Keep the current sticky-note pad and a few writing tools close at hand, then use the drawer for extras. Avoid adding so many visible containers that they become obstacles around the area you wanted to clear.
Clean the empty tray periodically with a method suitable for its material. For ordinary plastic organizers, a soft, lightly damp cloth is a gentle starting point; dry the surface before returning paper or metal supplies. Follow any specific care instructions supplied with the item, and avoid aggressive cleaners when the finish is uncertain.
Use the space above the desk carefully.
Wall files are useful when paperwork needs to remain visible but the desktop is small. Put them close to the point where the papers arrive or where you will act on them. A wall pocket beside the door can hold incoming forms; a pair above a work surface can separate items to review from items ready to leave. Choose a position you can reach comfortably without stretching over equipment.
Before mounting anything, identify the wall or partition material and check which attachment method is appropriate. Included screws or tape do not mean that every surface is suitable. Follow the supplied installation instructions, respect any stated load limits and ask the person responsible for the space before drilling or attaching storage to a shared office partition.
Leave space above each pocket so a full-size folder can move in and out. Check that a door, chair or nearby shelf will not hit the loaded organizer. Clear pockets make folder colors and labels easier to see, while a translucent finish gives a softer view of the contents. Neither option turns an exposed wall file into secure storage for confidential material.
Magnetic organizers solve a different problem. They can keep markers or small notes near a compatible magnetic board, but they will not attach securely to every whiteboard, cabinet or wall. Test the surface and attachment before loading the compartments. If the item has keyholes for optional wall mounting, confirm whether screws are supplied and select appropriate fixings separately when needed.
For a pegboard or slatwall area, group small trays around the task performed there. A frequently used tool should be easy to remove without knocking the next tray. Start with a modest load, check the fit and keep heavy or awkward items in storage designed for them. The wall organization collection separates these different attachment formats so you can choose deliberately.
Build a small desk that travels.
If your work regularly leaves the chair, decide whether you need a writing surface, enclosed storage or both. A flat clipboard is light and direct: it holds the current form or checklist where you can write on it. A clipboard storage box adds room for spare forms and selected supplies. The useful choice depends on what you carry, not simply which case has the most space.
Match the case to the paper. Standard US letter sheets measure 8.5 by 11 inches; legal sheets are longer. A case designed around letter-size documents may not take legal paperwork without folding. Check the selected model’s description and overall dimensions, then consider the bag, shelf or vehicle compartment where you plan to keep it. A larger case can solve the document problem while creating a new storage problem.
Keep active pages under the clip and reserve the enclosed space for the next forms or a small supply kit. Place writing tools in their intended compartment when one is provided. Do not overfill the case until the closure is under pressure. Before moving, check that the clasp is engaged and that loose objects cannot fall out when the lid opens.
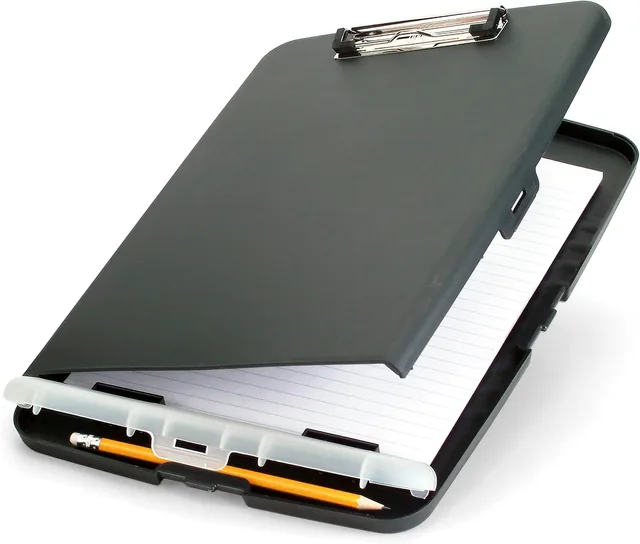
A storage case is not automatically waterproof, secure or protective enough for a device. Unless the selected product explicitly supports those uses, treat it as document organization rather than specialist protection. Verify the dimensions of any tablet or accessory separately. Keep sensitive paperwork under your control and follow your workplace’s procedures for transport and storage.
At the end of the trip, return completed forms to their next destination and replenish only what you used. A portable case is easier to maintain when it carries a small, repeatable set of essentials rather than every object that happened to be useful once.
Make a planner useful for your own pages.
A ring-bound planner can bring printed checklists, notes and reference pages into one place. Before punching anything important, check the ring arrangement and the paper format. “A5” describes the page size, but it does not mean that every binder uses the same hole pattern. Compare a test sheet with the rings and with an existing page that fits correctly.
Set an adjustable punch for the intended format and align the paper guide. Use an ordinary scrap sheet first, then close the planner around that sheet to check the result. Leave enough margin between text and punched holes. A page that looks well aligned on screen may need a wider inner margin when printed for a ring binder.
Respect the punch’s stated capacity and paper weight. The selected six-hole punch is rated for up to eight sheets of 20 lb paper. Heavier stock or laminated sheets are different materials and should not be treated as an equivalent batch. Work in smaller groups when appropriate and never force a mechanism that resists normal operation.
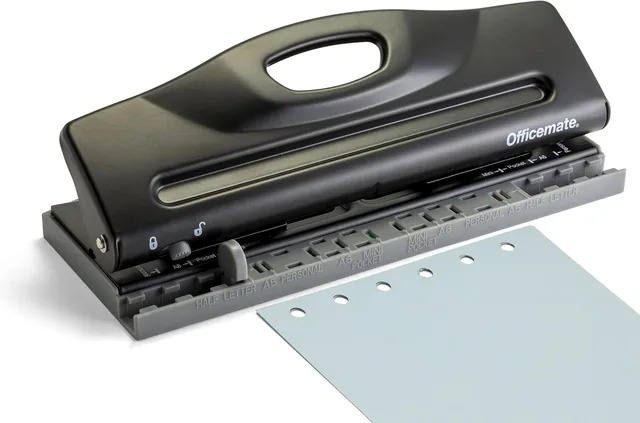
Empty the chip tray before paper waste builds up, keep the work surface clear and use the handle lock for storage when provided. Review planner contents as part of your normal routine. Keep current pages easy to find, move old reference material elsewhere when practical and leave enough room for the rings to turn freely. A planner that is too full is harder to use even when every page is perfectly punched.
Keep the reset small enough to repeat.
A useful desk routine should fit the real workday. At a natural stopping point, return loose tools to their compartments, identify the next action for active papers and clear enough space for tomorrow’s first task. The point is to leave an understandable starting place. You do not need to erase every sign of work before going home.
After a week, notice what repeatedly ends up outside its intended place. That is useful feedback. Perhaps the tray is too far away, a compartment is too small or the label does not describe the way the item is used. Change one part of the arrangement and try it again. A practical system adapts to the person using it.
Review stored papers and surplus supplies on a schedule that fits their purpose. Follow workplace requirements for records, confidential information and disposal; a general organizing guide cannot set those rules. Keep the desk focused on active work and use appropriate longer-term storage for material that must be retained.
Your next useful step.
Choose one area and make one decision before adding more storage. The checklist below keeps the selection practical. You can use it for a drawer tray, a wall-file arrangement or a portable paperwork kit.
- Identify the task or object that needs a clearer place.
- Measure the usable width, depth and height of the intended location.
- Check the selected product’s dimensions, finish and pack quantity.
- Confirm the document format or mounting method where relevant.
- Read which pieces are supplied and which objects are only shown for context.
- Leave enough room to reach, open, remove and clean what you use.
- Start with a working quantity of supplies and give refills a separate home.
- Review the arrangement after a few ordinary workdays.
A good choice is one you can use without thinking about the container. Start with desk and drawer organizers, make use of wall space, or compare clipboards and storage cases for the work that travels with you.